This article will cover the basics of how to record a video on a Windows 10 laptop using the native Camera app.
Click on the Start Menu, and start typing Camera. When the search result comes up with the app, either hit Enter or click on the result.
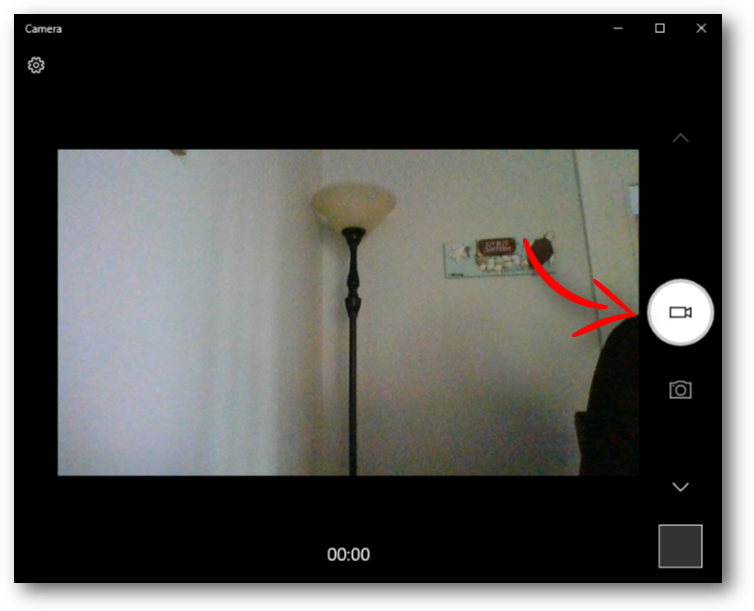
Here’s how the app looks. Over on the right, make sure that video is selected, not photo.

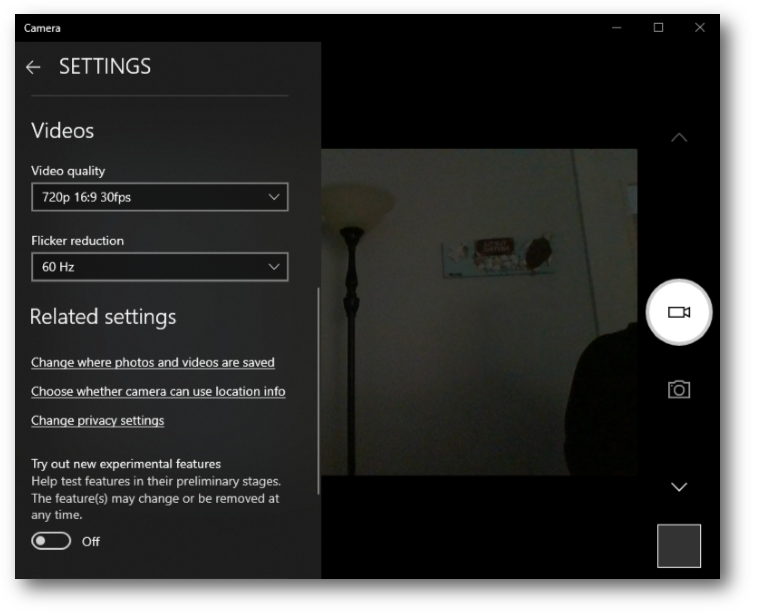
You should be able to just use the default settings, but in case you need to change them, click on the gear icon at the top left of the window, then scroll down to video settings. Note: at this time, you can’t change where the video is saved (more on video saving later).

If you need for your videos to take up less memory, you can use the Video quality dropdown menu. It’s recommended that you test the lower quality settings to find the right combination of smaller file size and the poorer quality of how the video looks.
We recommend that you use the Microsoft Stream service (provided as a part of Union College accounts) to host your videos. If you do that, or use another streaming host, the memory size of your video shouldn’t matter.
Once you get ready to take your video, click here:

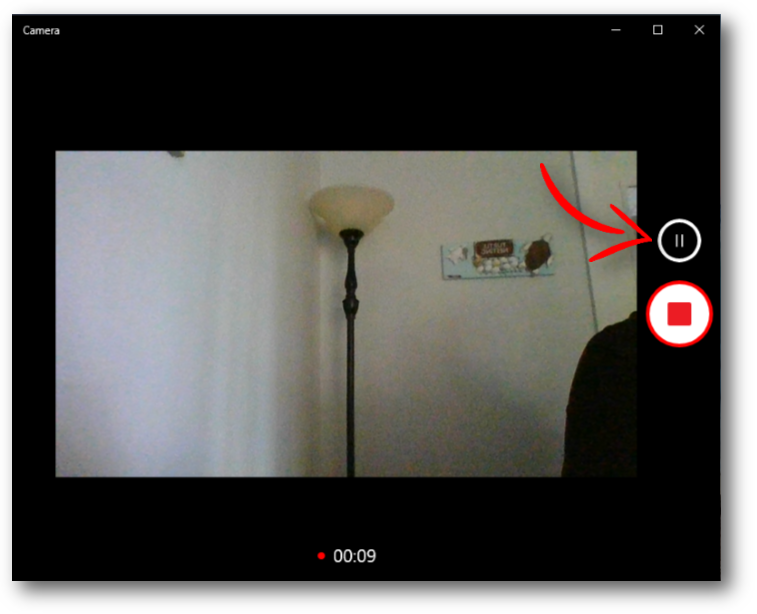
After the recording has started, you can pause the recording using this button. When you pause and restart, the end product will be one continuous video. When finished, click the button outlined in red.

If you’re going to use Stream to host your video, don’t worry too much about what happens at the beginning and end. Stream allows you to easily trim the start and finish of your videos.
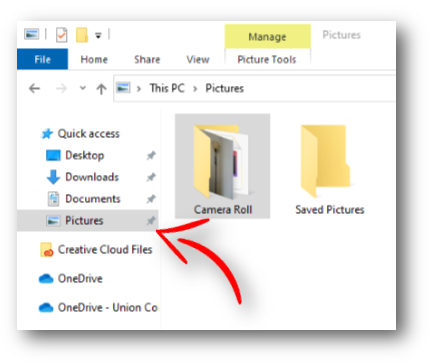
After you have stopped recording, then you should go find it, rename it, and move it to your OneDrive for organization and safekeeping. The filepath for where Camera saves videos is:
C: > User > [Your Username] > Picture > Camera Roll
Or, when you open File Explorer, you should see Pictures in the left sidebar. Click on it, then click on the Camera Roll folder.

24/7 Phone: 606.546.1650
Email: support@unionky.edu
Walk-Ins: Black Technology Center Mon-Fri, 8am-4:30pm